2015 was the first time we started making our own sugar skulls. We enjoyed it so much that we decided to do it again this year, except this time we invited some of our relatives over for a sugar skull decorating party. Today I’m sharing how to make sugar skulls for Day of Dead from start to finish. I hope you enjoy this post. It’s one of my favorites.

Every year that passes since my first Day of The Dead post, I fall in love with this Mexican holiday tradition more and more. That first year was tough because I wasn’t sure how my relatives would react since they don’t celebrate it, or how my husband and his family would feel about it since we were including my Mother-in-Law in our altar. My daughter was four years old and had already begun to ask questions about her Grandmother. We talked about her as often as she wanted and showed her pictures of her Grandmother, but the Mother in me couldn’t let that be all that we did to honor her. She deserved more.
I never got the chance to meet my maternal Grandmother, and I barely knew my paternal Grandmother, so there has always been a part of my heart that wished I knew them on a personal level. Every child wants to be loved and spoiled by her Grandparents the same way she wants to be loved by her own parents, and it makes me sad that my children never got to meet their father’s mother. She would have been a wonderful Grandmother.
This is our way of honoring her and all our relatives we want our children to remember. Dia de los Muertos allows us the opportunity to honor and celebrate their lives by inviting their spirits into our homes by building an ofrenda altar. This one is from 2017.
Sugar skulls are included in the ofrenda as a representation of our friends and family being honored in the altar as well as for decoration. Today I’m sharing what I’ve learned about how to make sugar skulls for Day of the Dead in hopes that it will help you have a smooth and enjoyable experience if you are making them for the first time.


How to Make Real Sugar Skulls From Scratch
First, you’re going to need some molds. Most of my molds are from MexicanSugarSkulls.com, but you can also find them on Amazon. I highly recommend you visit the Mexican Sugar Skulls website after you read through this post to get more tips. I learned a lot through my own trials and errors, but ultimately they started me off in the right direction and saved me a ton of time. Also, you can purchase all the tools and materials you will need from there too.
If you don’t have the time or energy to make them at home, however, you can also buy everything made and ready to go from my Etsy shop Sugar Skull Company, where you can create a custom kit for yourself, family, or party. Just send me a message through Etsy and we can create a custom package for you.
OK, let’s get started!
Let’s start with a list of what you will need to make the sugar skulls:
- Sugar skull molds
- Large bowl
- Measuring cup
- Large spoon or whisk to combine (or you can use your hands)
- 1 teaspoon measuring spoon
- Regular white granulated sugar (I would start with a 10 pound bag)
- Meringue powder
- Water
- Cardboard squares (that are at least 5″ x 6″ in size)

The amount of sugar you are going to need will depend on the size and amount of the sugar skulls you make so it’s difficult to know exactly how much sugar you are going to need in the beginning. My advice is to get a 10 pound bag and start there.
For every 1 cup of sugar you use, add 1 teaspoon meringue powder + 1 teaspoon water. Combine the sugar and meringue powder well before adding the water.
Mix all three together until the sugar feels almost like damp sand and can be shaped in the palm of your hand when squeezed.
Begin packing the molds by making sure all the small details are tightly packed first – such as the eyes, nose, and mouth. Then finish packing more sugar into the mold until completely full.

Using one of the cardboard squares or a scraper, scrape off the excess sugar to create an even, flat back surface.
Place a cardboard on top and flip the whole thing over. Gently lift off the mold and let the sugar skull dry at least three hours.

After three hours, scoop out some of the sugar from the center of each skull half, leaving a thick border around. Be careful not to scoop out the neck part though. Do not skip this step! It’s important to remove some of that excess sugar to speed up the drying process and prevent moisture build-up.
Once you’ve removed the extra sugar, allow them to dry hollow-side-up overnight.

With the extra sugar that you have left and have scooped out, you can reuse it to make one batch of the small molds if you have one.
If the leftover sugar feels a little dry, sprinkle a little bit of water onto the sugar with your hand or a spray bottle and mix it again.
How to Make Royal Icing for Sugar Skulls
The next step is to make the icing that will hold the two skull halves together, which I got from Wilton.com.
For this you will need:
- 4 cups confectioners’ sugar (powdered sugar)
- 3 tabelspooons meringue powder
- 5 tablespoons water
- An electric mixer with paddle or whisk attachment
- 12 inch disposable decorating bagfor icing (plus more for colred icing)
- Rubber band or an icing bag tie (optional)
If you’re having a sugar skull decorating party and want to make larger batches of royal icing, use the following ratios:
One 2-pound bag of confectioners’ sugar + 1/2 cup meringue powder + 2/3 cup water.

Combine the confectioners’ sugar with meringue powder on low speed for a minute, then add the water. Keep mixing it on low until it starts to look like icing, then increase the mixing speed to medium (a 2 on the Kitchen Aid mixer I think). Mix for 5-7 minutes with a whisk, or paddle until the icing begins to form stiff peaks. If you feel like it’s too stiff, mix in one teaspoon of water at a time until it’s soft enough to pipe, but can still hold its peaks. If you’re using a whisk, the time will be more like 3-5 minutes.
Fill a disposable icing bag with the icing, but not too close to the top or it will be a bit more difficult to manage when squeezing. I made that mistake and ended up having to remove the tie and squeeze it back in.
If you’re not using a piping tip, you can now cut off about 1/4″ of the tip to make a hole.
Those icing bag ties are super helpful by the way. They may seem like a waste of money, and you might be thinking why not just use a rubber band, but they were much easier to use than a rubber band believe it or not. For a few bucks it made everyone’s life much easier when decorating their sugar skulls. Especially for the kids.
How to Use Couplers with Piping Bags
If you are using a coupler, insert the plastic coupler tip into the bag first. Push it down gently as far as it goes, then cut off the excess bag tip.

Next, place the decorating tip over the bag and coupler, preferably a wide one when you glue the two halves together, then close it with the coupler ring.


How to Assemble Sugar Skulls with Royal Icing
Squeeze a thick ribbon of icing onto the back half of the sugar skull, then quickly align and press the two together. If none of the icing came out after pressing them together, add a thin line of icing along the line where they meet, then wipe it off with your finger to help create a smoother seal.
It is helpful to keep one damp and one dry kitchen towel nearby to clean the excess icing off your fingers after each assembly.
 Let them dry at least three more hours before decorating.
How to Make Colored Royal Icing for Sugar Skulls Made of Sugar
When you’re ready to decorate them, use the same recipe for royal icing that I shared above, or use what you have left from glueing the sugar skulls togehter. Add a few drops of concentrated food coloring, such as Wilton’s coloring gels, to about half a cup of plain white royal icing in separate small bowls for each color. Mix well, add a few more drops of coloring if needed.

Royal icing piping bag tip: If you have a difficult time filling the piping bags, use a tall skinny cup to hold the bag upright for you.

A 2-pound bag of confectioners sugar should get you about 7 or 8 colors, depending on how much white icing you have left after gluing the two skull halves together.
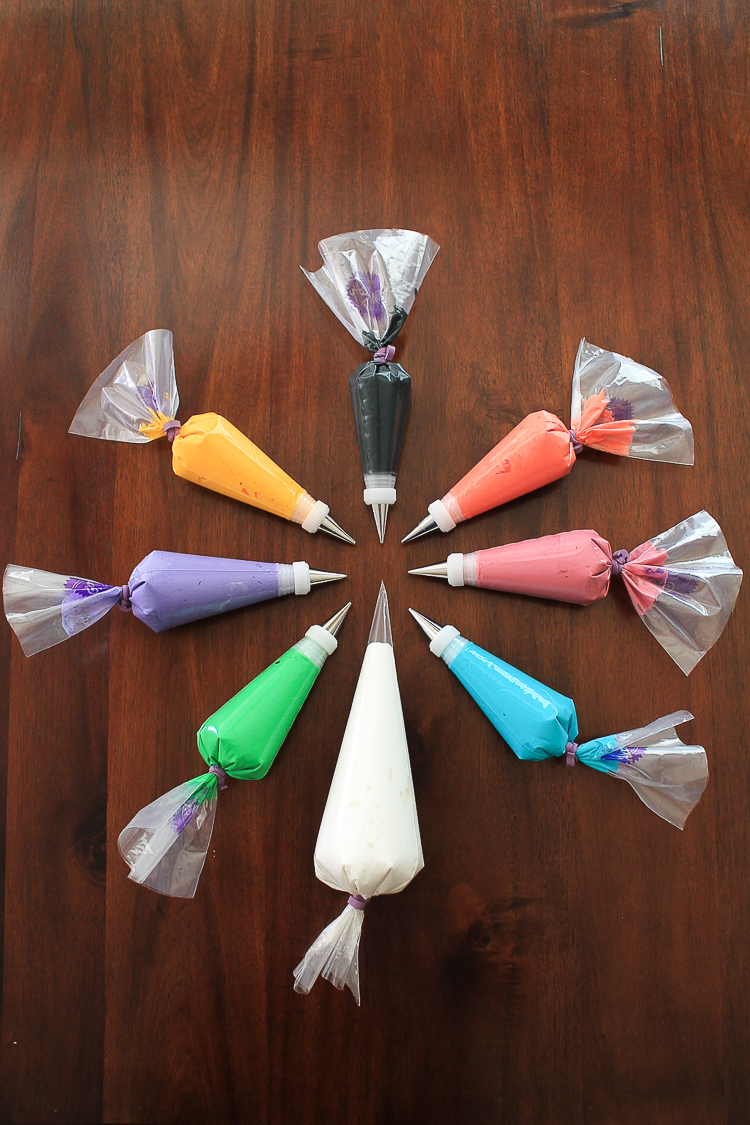
Tie the ends in a knot, with a rubberband, or wilton bag ties, and have fun!

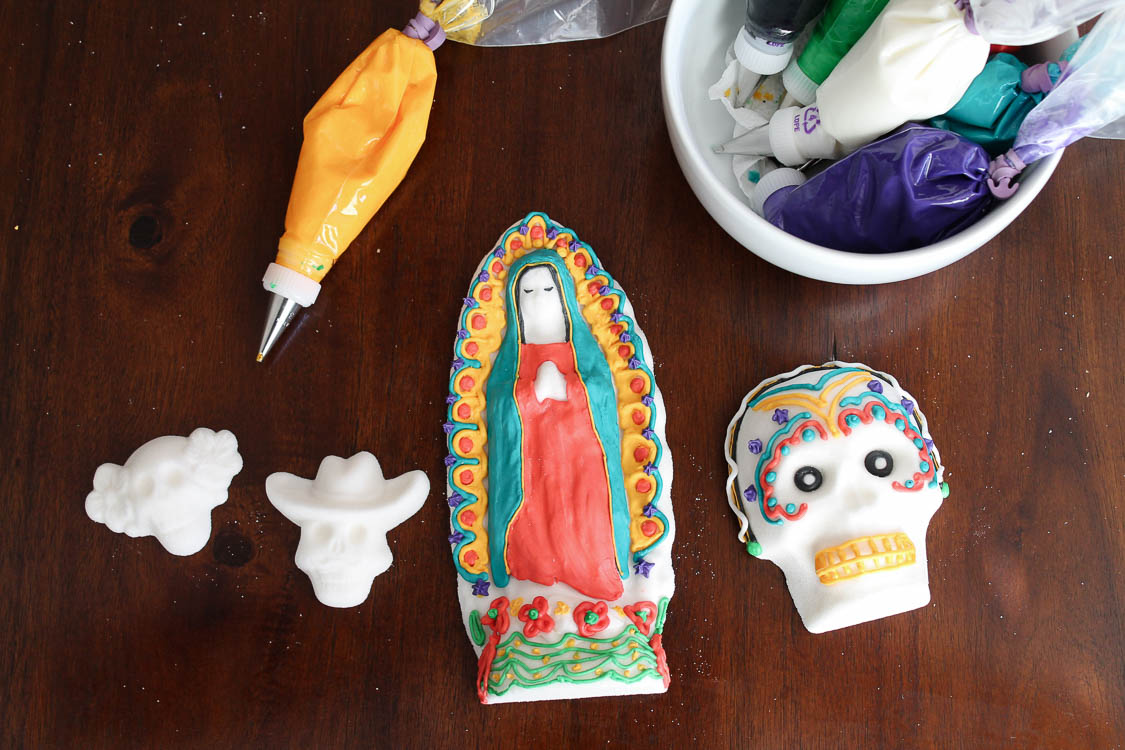
Tips for Decorating Sugar Skulls with Royal Icing
It’s fun to use a variety of piping tip sizes. Some of my favorite Wilton piping bag tips are numbers 2, 3, 16, 67, and 224.
Wet paintbrushes work well to help spread or flatten the icing. We had a few small bowls around the table with a small amount of water to dip the paintbrushes in to clean them. Just make sure you remove any excess water by wiping the brush lightly on a napkin so that it’s not dripping water onto the sugar skulls.


These were just a few of the ones made by the kids and another adult. I didn’t get a good picture of the rest.

Brown sugar was the hardest to work with. If you make them, use golden brown sugar instead of white, and follow the same recipe above for the sugar skulls. Let them dry 3-4 hours, then bake them on a cookie sheet in the oven at 200 degrees for an hour. Let them cool off completely before decorating.
And whatever you do, don’t make them on a humid day. The brown sugar soaks up humidity like a sponge and won’t let them harden properly. I had to redo my entire first batch because of the high humidity we had that week.

At last, we are done!
Well almost.
I still need to finish my Virgen.
Isn’t she purdy? 🙂

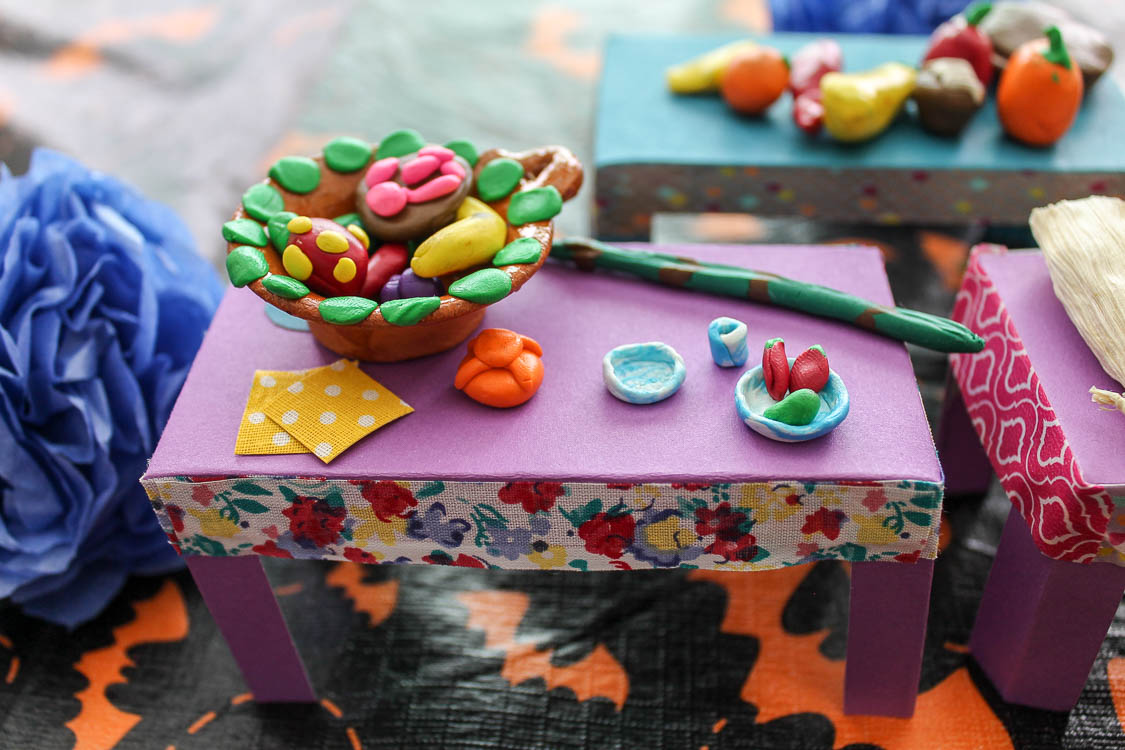
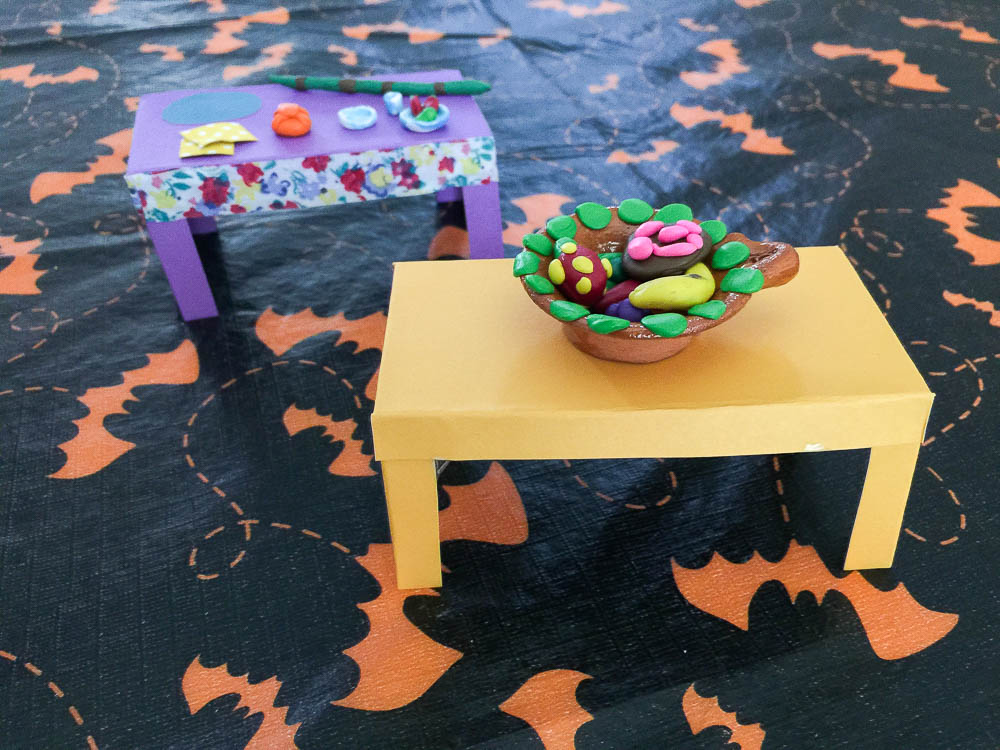
Looking for another activity to do with your children? You might like this paper table craft project for school-age children.
We always have fun making these. My daughter even made one for her miniature dollhouse altar this year.
If you prefer to buy sugar skulls and icing already made, visit my Etsy store where I sell cutomizable sugar skull decorating kits.
Check them out here>> https://www.etsy.com/shop/SugarSkullCompany
Ok, bye for real now. 🙂

Very pretty!! It takes so much work but it’s worth it. I want to make them one day!! Your post makes it so cool to follow the directions!
Thank you, Dariela! Yes, it is a lot of work, but at the same time relaxing for me. I’m glad you found my post helpful. 🙂
Hi Stephanie! These are gorgeous. I’ve never made them myself (always buy) and you are really inspiring me to do so. Thanks for sharing!
You are so very welcome, and thank you for the compliment. I really enjoy making them.
You should definitely try making them one of these years. You can totally do without the couplers and icing tips if you don’t want to spend the money on them, although they do make decorating easier and more fun because you can change the size of the hole back and forth as needed. You can even use a ziplock bag instead of an icing bag! Just make a small hole by cutting the tip of the bag off.
Thanks for taking the time to comment!
[…] month we had a sugar skull decorating party that ended up being a huge success. Not only did it provide us with an activity that everyone […]
thank you for sharing. cant wait to make with the grand children. again so kind of you to share..have a great day cheri
You are most welcome, Cheri! I hope you all have fun making them. We always look forward to it. Feel free to message me on Instagram with questions if you come across some obstacles in the process. 🙂
I’m getting ready to attempt these! How long do they last? Thank you!
They can last anywhere between 2-5 years, maybe even 7 years if you give them the proper amount of time to dry. A fan helps ensure they dry well.
When you store them, wrap them in gift bag tissue paper and keep them in a well-sealed box or storage container. Good luck! Feel free to message me on Instagram @sugarskullcompany if you have more questions!